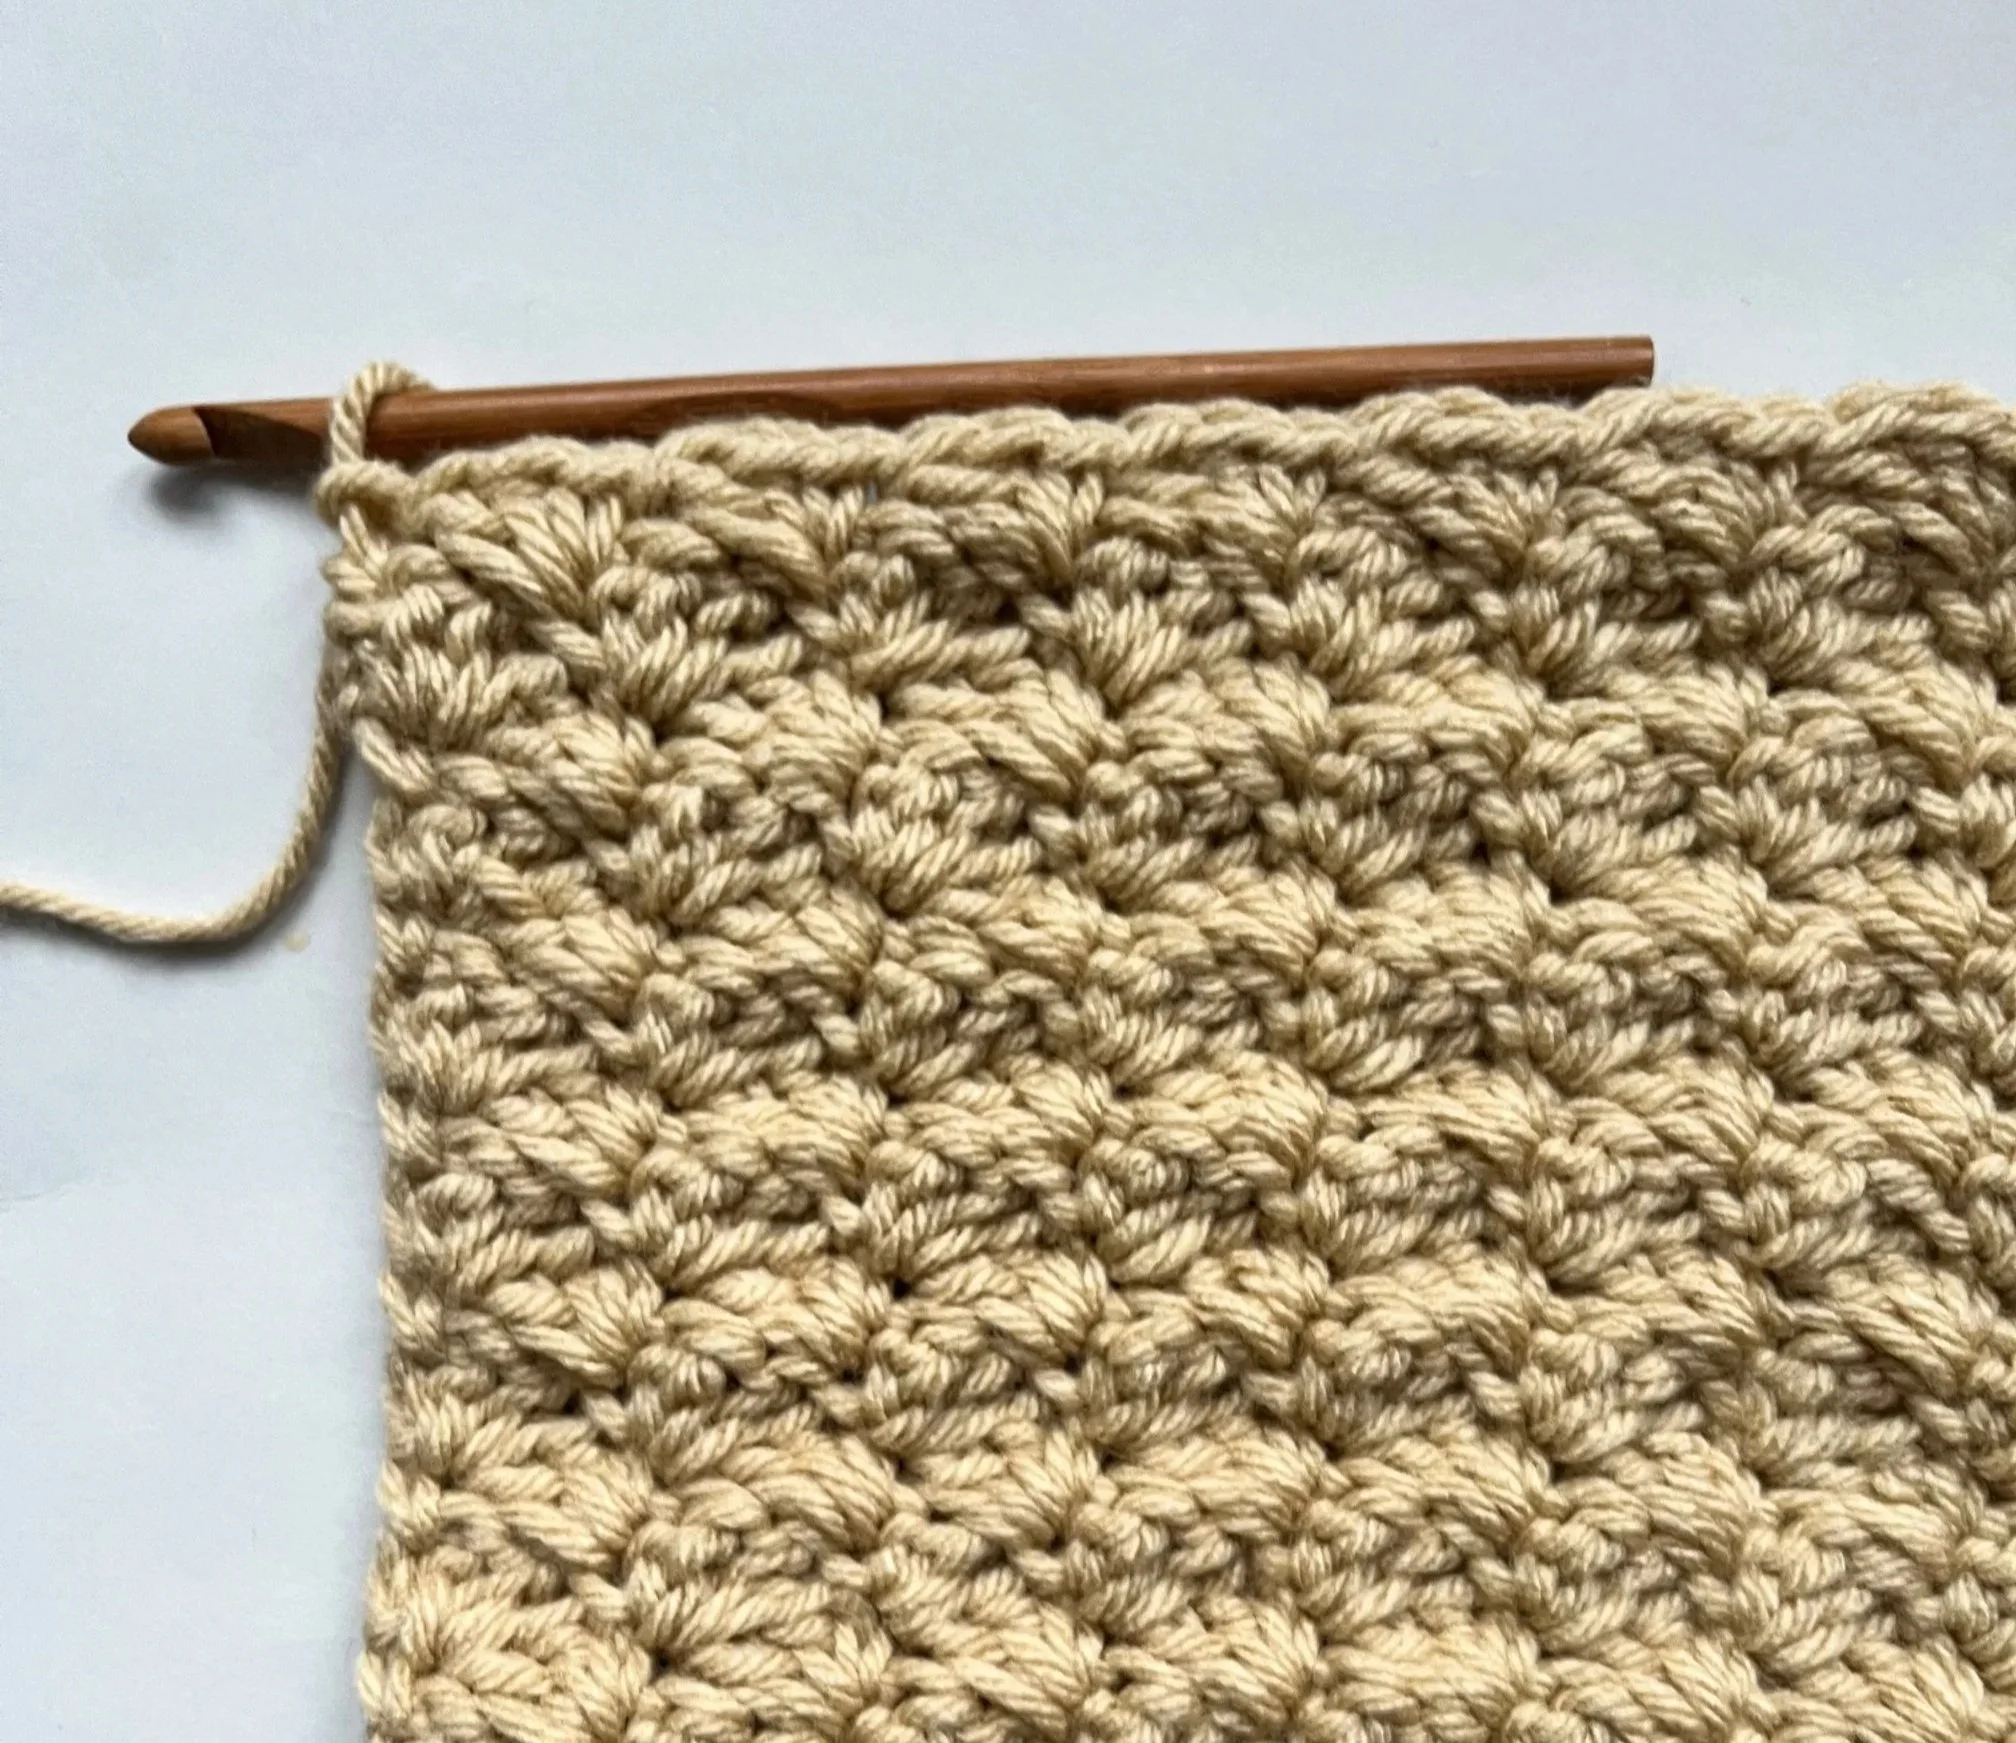
How to Crochet the Closed Shell Stitch
Trying out a new crochet stitch is like adding a new tool to your creative toolbox—it opens up more opportunities for your next projects. The closed shell stitch is a lovely dense, textured pattern. It combines clusters of stitches to create a textured, elegant look that’s perfect for a variety of items, from cosy blankets to scarves.
Why Try the Closed Shell Stitch?
If you’ve been crocheting for a while, you might be itching to try something beyond the basics like single or double crochet.
The closed shell stitch is a step up in complexity but still easy enough for beginners to master with a little practice. Plus, its versatility makes it a favourite for many crocheters—it’s just detailed enough to add interest without being overwhelming.
I can see it being used for baby blankets, table runners, or even tote bags. The interlocking shells create a dense fabric, which makes it ideal for keeping warm or for items that need a bit of structure.
Yarn Choices and Texture Effects
The yarn you choose can dramatically change the look and feel of your finished piece. A chunky yarn will give the closed shell stitch a bold, almost architectural vibe, perfect for statement pieces like oversized throws.
On the other hand, a lightweight cotton yarn will result in a delicate, airy fabric that’s perfect for summer shawls or lace-inspired projects.
When I first tried this stitch, I used a multi-coloured yarn. The gradient effect added depth to the shells, almost like a mosaic.
If you’re experimenting, try swatching with a few different types of yarn to see how the stitch behaves—it’s a game-changer.
Ready to try it?
Closed Shell Stitch - Instructions
Here's how it goes:
I used organic wool with a 6 mm hook.
Stitch abbreviation:
Double crochet: dc/US = Treble crochet: tr/UK
Chain stitch: ch
US terminology.
Instructions
Start: For the foundation chain, make a multiple of 6 ch, plus 2 extra
Row1:
1 sc in second ch from hook.
Miss the next 2 stitches
5dc in the next stitch
Miss the next 2 stitches
1sc in the next
Repeat steps 2 and 5 until the end of the row
Row2:
3 ch (counts as first dc)
2 dc in next stitch
Miss the next 2 stitches
1sc in the next stitch
5dc in the next sc stitch (between the shells)
Repeat steps 3 and 5 until the end of the row
Row3:
1ch ( does not count as a stitch)
1sc in the first stitch
5 dc in the next sc (between the shells)
Miss next 2 stitches
1sc in the next
Repeat steps 3 and 5 until the end of the row
Tips for Mastering the Closed Shell Stitch
When working with this stitch, tension is everything.
The shells rely on clusters of stitches, so keeping an even tension will ensure they look uniform. If you’re a bit loosey-goosey (like I was when starting out), don’t worry—it just takes a bit of practice. Also, make sure to count your stitches carefully; shells have a way of making you lose track if you’re not paying attention.
For a modification of the stitch consider alternating rows of closed shell stitches with rows of plain single crochet.
It gives the design a clean look while still showcasing the stitch’s texture.
Learning a new stitch isn’t just about mastering a new pattern—it’s about opening the door to more creative freedom.
Whether you’re crafting a winter blanket or a spring wrap, knowing different stitches can elevate your project to something truly special.
So grab your yarn and hook, and give it a try.
Have you tried the closed shell stitch before?
I’d love to hear how you’ve used it in your projects!
Let’s keep the creativity going—share your tips and experiences in the comments below.
Happy crocheting!


A beginner-friendly crochet basket you can actually finish.
This calm weekend project uses simple stitches, clear instructions, and a complete kit — so you can stop overthinking and enjoy making something practical for your home.