
Your Crochet Guide: How to Start Crochet and Find Relaxation
Updated January 2025.
Are you looking for a creative hobby?
Crochet might just be the perfect fit!
Crochet not only lets you create beautiful and functional items but also provides a mindful escape from daily stress. Ideal for quiet evenings, cosy rainy afternoons and all the times in-between.
Learning to crochet is simpler than it seems, and once you get the basics, it becomes downright calming—like a moving meditation with yarn.
By the of this crochet guide end, you’ll know the tools, the techniques, and even how to make your first project.
Let’s begin.
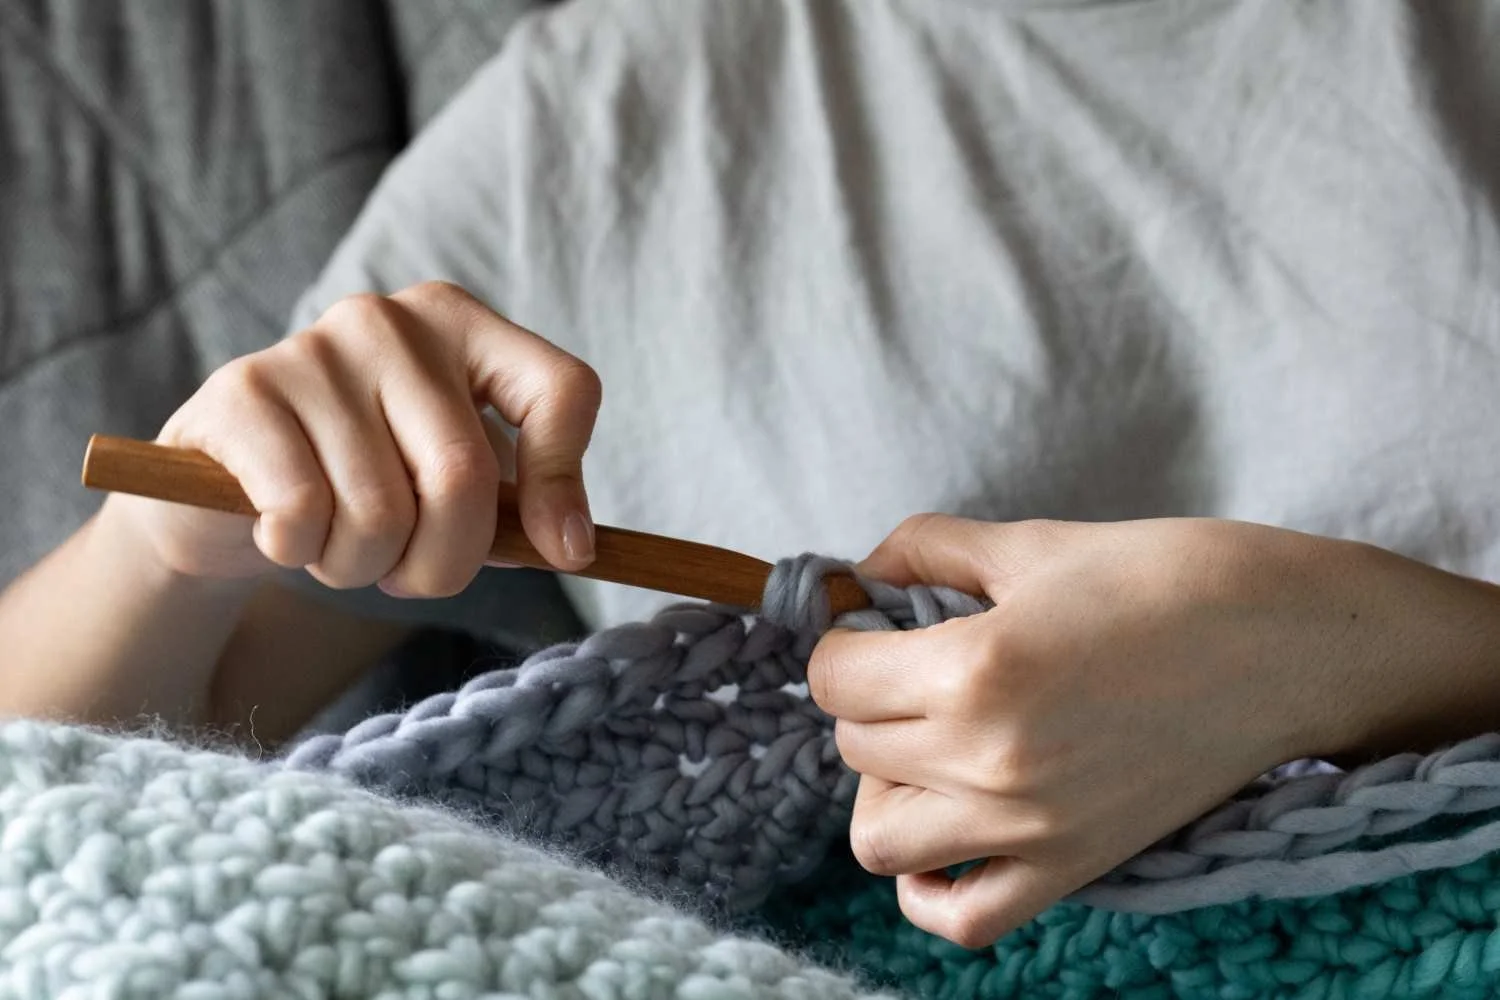
Crochet and its power of calm
Before you grab your crochet hook and yarn, let’s talk about why crochet is more than just a craft. It’s a form of therapy wrapped in loops and stitches.
Crochet isn’t just the process of turning yarn into fabric with a hook—it’s a rhythm, a flow, a moving meditation.
Those repetitive motions?
They relax your mind, easing stress and calming the chaos of everyday life.
And the bonus?
You get to create something beautiful along the way.
The Science of Serenity
When you crochet, your brain enters a state of flow. The steady movements lower your heart rate and blood pressure while keeping your hands and mind focused. It's like mindfulness but with yarn.
Anxiety?
It fades into the background as your mind zones in on each stitch, grounding you in the moment.
Crochet isn’t just a hobby—it’s a little act of self-care that makes a big difference.
Crochet Tools you need to get started
Fortunately, crochet requires minimal equipment, making it an accessible hobby for many.
Essential Crochet Tools
Crochet Hook:
The size of your hook will depend on the yarn you choose, and it's usually indicated on the yarn label.
Metal, plastic, and wooden hooks are all available, offering different weight, texture, and grip benefits.I recommend beginners start with a larger hook like a 4mm hook, also known as size G-6 in the US.
➤ Recommendation:
If you need to buy a hook, for beginners, I recommend the Yariss Crochet Hook Set on Amazon—it’s affordable, comfortable, and has everything you need to start your crochet journey.
Crochet Yarn:
Start with a yarn that's easy to work with, such as a medium-weight yarn, often labelled as "worsted”.
A higher weight indicates the need for a larger hook size, resulting in a larger final project size. It’s also good to pick use yarn in a light color, which allows you to see your stitches more easily.
➤ Recommendation:
The Lion Brand Yarn Basic Stitch for beginners because it’s soft, versatile, and doesn’t fray easily, making it perfect for learning basic stitches and creating smooth looking projects.
Optional Crochet Tools for Beginners
While you don’t need much to start crocheting, a few extra tools can make the process smoother. Needle scissors are great for trimming yarn cleanly, and a measuring tape helps ensure your projects are the right size.
Tapestry needles make weaving in loose ends easier, and stitch markers can keep track of your rows or patterns.
These crochet tools aren’t essential for complete beginners but can be handy as you grow more confident with your crochet projects!
Yarn Needle: Used for weaving in the ends of your project once you've finished.
Scissors: A good pair of scissors for cutting yarn is essential.
Measuring Tape: Crochet often requires specific sizing, so a measuring tape can help ensure your project is the right size.
Stitch Markers: These are essential for marking the beginning and end of your rounds or rows, or any other important points in your pattern.
More on the topic : 10 Tools Every New Crocheter Needs
The Basic Crocheting Techniques to get you started
Before you can crochet, you need to understand a few basic techniques. Here's what you need to know before you start.
How to Hold a Crochet Hook
There are several ways to hold a crochet hook.
The most common way to hold your hook is the "pencil grip."
Hold the hook as you would a pencil, with your thumb and forefinger near the hook's tip for control.
The “knife grip” is a method of holding a crochet hook that resembles how one would hold a knife. This grip involves holding the thumb rest with the thumb and third finger while the pointer finger stretches along the back of the working area. The knife grip is known for allowing smaller hand movements and potentially being easier on joints and wrists compared to other grips.
Try both ways and see which one seems more natural for you.

Pencil Grip
The most common way to hold your hook is the "pencil grip." Hold the hook as you would a pencil, with your thumb and forefinger near the hook's tip for control.

Knife Grip
To hold a crochet hook in this position hold it as you would when using a table knife to cut food.
How to hold your yarn
There are also various techniques for holding yarn, and there isn't a single correct method.
Let's explore the preferred Mouse and Sparrow approach to yarn holding!
Start by grasping the yarn with your left hand (if you're right-handed) and loop it around your pinky finger. Next, pass the yarn over your index finger. Lastly, secure the yarn between your thumb and middle finger.
Your thumb and middle finger will act as a stabilizer while you work on your project.
Hold the yarn in a way that feels most natural and comfortable for you.

Holding the yarn
In order to control the flow of the yarn to you hook you need to twist it around your fingers of your free hand.
Wind the yarn around your little finger.
Pass the yarn underneath your two middle fingers, then over to your index finger.
Twist the yarn around your index finger.

With this method, your middle finger and thumb will hold the crochet work steady in place.
Basic Crochet Stitches
Learning to crochet can take a little time because there are several basic stitches to master. But there is no need to learn all the crochet stitches at once. With only the chain stitch and the single crochet (referred to as the double crochet stitch in the UK) you can create many beautiful projects.
➤ Chain Stitch
Abbreviation: ch
The chain stitch is the most basic crochet stitch, serving as the foundation for nearly every crochet project. It’s the first stitch you’ll make when starting a project, creating a flexible base that can be used to form foundation rows or loops.
US vs. UK: In both US and UK crochet terminology, the chain stitch is the same and is simply referred to as “ch.”
➤ Slip Stitch
Abbreviation: sl st
The slip stitch is a versatile stitch used to join pieces of crochet work together, move the yarn a short distance, or create a neat decorative line or color change. It is worked by inserting the hook into a stitch and pulling the yarn through both the stitch and the loop on your hook in one motion. This stitch helps keep your crochet work flat and tidy.
US vs. UK: The slip stitch is the same in both US and UK terminology and is called “sl st” in both.
➤ Single Crochet
Abbreviation: sc
The single crochet is the shortest and often the tightest of the basic crochet stitches. It's a great stitch for creating dense fabrics and is often used for amigurumi, scarves, and dishcloths. When worked in rows, single crochet produces a firm, smooth fabric.
US vs. UK: In US crochet terminology, it’s called “single crochet” (sc), while in UK terminology, this stitch is called “double crochet” (dc).
➤ Half Double Crochet
Abbreviation: hdc
The half double crochet is taller than the single crochet but shorter than the double crochet. It creates a fabric that is softer and more flexible than single crochet, and it’s often used for projects that need a bit of height without becoming too lacy or open. It’s a great choice for blankets, scarves, and garments.
US vs. UK: In US terminology, this is called “half double crochet” (hdc), but in UK terminology, it’s known as “half treble crochet” (htc).
➤ Double Crochet
Abbreviation: dc
The double crochet is one of the most commonly used stitches in crochet. It’s a tall stitch that creates an open, airy fabric. This stitch is used in many types of projects, including blankets, shawls, and tops. Double crochet can be worked in both the round and back-and-forth rows, making it a versatile stitch.
US vs. UK: In US terminology, it’s called “double crochet” (dc), while in UK terminology, it’s known as “treble crochet” (tr).
➤ Treble Crochet (tr)
Abbreviation: tr
The treble crochet is the tallest of the basic crochet stitches. It’s perfect for creating long, lacy fabric that still provides coverage. This stitch is often used for lightweight scarves, shawls, and delicate lace projects. It’s also ideal for making open, airy patterns that drape beautifully.
US vs. UK: In US terminology, it’s referred to as “treble crochet” (tr), while in UK terminology, it’s called “double treble crochet” (dtr).
To learn more about crochet terms and their abbreviation check out the Crochet Stitch Dictionary
Crochet Stitches to learn first
To start, it's best to focus on mastering the foundation chain and the single crochet stitch. These two techniques form the basis of many crochet projects and provide the skills you need to build confidence and progress to more advanced stitches.
The Foundation Chain
The foundation chain, made with the chain stitch (ch), is the first step in almost every crochet project.
It’s like the "spine" of your work, providing a base to build your stitches on. Learning to make an even, consistent foundation chain is important, as it ensures your project will look neat and have the right tension from the start.

Crochet Foundation Chain

Single Crochet Stitch.
The Single Crochet Stitch (US) / Double Crochet Stitch (UK)
Once you’ve made your foundation chain, the single crochet (sc) stitch is the next step.
This is the simplest stitch used to build fabric row by row. It’s short, tight, and easy to manage, making it perfect for beginners. Working with single crochet helps you practice keeping your stitches even, understanding how to insert your hook, and getting a feel for the yarn tension.
By focusing on these two techniques at the beginning, you’ll develop the fundamental skills needed to create simple yet beautiful items like coasters, dishcloths, or even scarves.
As your confidence grows, you can gradually explore other stitches and techniques to expand your crochet repertoire. Remember, crochet is about enjoying the process, so take it slow and practice!
How to crochet
Now that we’ve covered the basics its time to crochet. To get step by step instruction on how to make a slip knot, foundation chain and first single crochet stitch check out this tutorial here.
The basic crochet stitches are the building blocks for any crochet project.
Here's how to do them:
The Chain Stitch
Make a slip knot and place it on the hook.
Yarn over (YO) the hook and draw the yarn through the slip knot.
This motion completes one chain stitch.

First Chain Stich
Hold the hook with the slip knot already on it. Wrap the yarn over the hook (yarn over) from back to front, then pull the yarn through the loop on the hook to create your first chain stitch.

Second Chain Stitch
Yarn Over: Wrap the yarn over the hook
Pull Through the Loop: Use the hook to pull the yarn through the loop already on the hook. This creates the next chain stitch.
Repeat the process: yarn over and pull through the loop on the hook. Each time you do this, you’ll create a new chain stitch.
The Single Crochet Stitch
Insert your hook into the next stitch.
Yarn over and pull up a loop – you'll now have two loops on your hook.
Yarn over again and pull through both loops on your hook.
This motion completes one single crochet.
Insert the hook into the second chain from the hook. Wrap the yarn around the hook, then draw the loop back through the chain. You have now two loops on your hook.
Next place the yarn over the hook again and draw it though both loops on the hook. This completes your first single crochet stitch. For step by step instruction check out this guide here.
Continue across the foundation chain, working one single crochet stitch into each chain stitch.

At the end of the row turn your work to position the yarn on the right edge or your crochet work, ready to begin the next row. To begin the row, make 1 chain stitch. This is called a turning chain, it brings your work up the height of the single crochet stitches that will follow.
Work the first single crochet into the first stitch of the row below. Work one single crochet stitch into each of the remaining single crochet stitches of the row below.
At the end of the row, work the last stitch into the top of the last single crochet of the row below.
To continue repeat the same process.
At then of the row turn work
Chain 1 (your turning chain)
Work 1 single crochet into the first stitch of the row below
Work 1 single crochet into each of the remaining stitches
By following these steps, you'll be able to start crocheting in rows effectively, creating flat pieces like blankets, scarves, or washcloths.
Want to learn more? Check out these Skillshare crochet classes for beginners
How to read a crochet pattern as a beginner
Seeing your first written crochet pattern may initially seem daunting and confusing. Most patterns utilize abbreviations instead of spelling out every stitch. While this may seem overwhelming at first, fret not! Many pattern creators, including Mouse & Sparrow provide a key for reference.
Here are some common abbreviations you're likely to encounter and their corresponding meanings in US crochet terms.
Understand the Stitch Abbreviations
Familiarize yourself with common crochet stitch abbreviations such as:
ch - chain
sc - single crochet
dc - double crochet
hdc - half double crochet
tr - treble crochet
sl st - slip stitch
Stitch Instructions
Each pattern guides you through every round or row, detailing the steps to follow.
But how exactly do you interpret the instructions?Here are some common examples:
sc in next st = it means to make a single crochet stitch in the next stitch.
sc x 20 = Referring to the chart, we know that "sc" stands for single crochet. Therefore, you would crochet 20 single crochets - placing one in each stitch.
[sc, inc] x 5 = This might appear complex, but it simply indicates that you should repeat the actions within the [brackets] a total of five (x 5) times. Meaning, perform a single crochet in one stitch, then an increase in the following stitch. Repeat this alternating sequence of single crochet and increase five times in total.
Pay Attention to Repetition:
Look for repeat symbols or instructions in the pattern. Common repetitions include asterisks (*) and brackets ([]), indicating which stitches or sets of stitches should be repeated.
For a more in depth look at crochet patterns download this guide here: How To Read Crochet Patterns For Beginners
Simple Beginner's Crochet Projects
One of the most rewarding aspects of crochet is watching your creations come to life, transforming simple yarn into something beautiful and practical. If you're new to crochet, starting with beginner-friendly projects will help you build confidence and master the basics. Check out these easy crochet patterns for beginners and try your hand at these fun starter projects:
A Simple Scarf
A straight scarf is an ideal first project. It allows you to practice foundation chains, maintain consistent tension, and experiment with basic stitches like the single crochet (US) or double crochet (UK). Plus, a scarf is a practical accessory that makes for a thoughtful handmade gift. Try using soft, eco-friendly yarn for added comfort and sustainability.
A Set of Cotton Yarn Potholders
Potholders are beginner-friendly square projects that are perfect for practicing rows, foundation chains, and single crochet stitches. Using cotton yarn makes them durable and heat-resistant, ideal for use in the kitchen. They’re quick to make and offer a great opportunity to try out different colors and stitch variations.
A Cosy Beanie
A simple beanie is a fun, beginner-friendly project that teaches you how to work in the round and practice increasing stitches. Beanies are not only quick to make but also versatile and wearable. Choose a soft, warm yarn like organic wool for a coy finish and a sustainable touch.
Crochet Coasters
Crochet coasters are smaller projects, but they help you perfect your stitches while creating something useful. You can experiment with different shapes like circles or squares and use colorful yarn to add a touch of personality to your home. These make excellent handmade gifts for housewarming parties or holiday celebrations.
Starting with these beginner crochet projects will help you develop essential skills while creating items you can be proud of.

About Mouse and Sparrow
At Mouse and Sparrow, we’re passionate about bringing mindfulness, creativity, and sustainability into the world of crafting.
Our mission is simple: to help you discover the joy and calm that comes from slowing down, picking up a hook, and creating something beautiful with your own hands.
We believe that crafting should be as stress-free as possible, which is why we’ve designed our beginner-friendly crochet kits to take the guesswork out of getting started. Each kit comes with everything you need—eco-friendly yarn, a high-quality crochet hook, easy-to-follow instructions, and all the accessories required for your project. No more wondering what materials to buy or if you're using the right tools!
Why Choose a Crochet Kit?
If you’re just starting your crochet journey, a kit is the perfect way to learn. With one of our kits, you’ll:
Save Time and Effort: Everything is included, so you can focus on enjoying the process without worrying about sourcing materials.
Reduce Stress: Our step-by-step instructions and curated materials make crochet easy and relaxing, even for complete beginners.
Embrace Sustainability: We use eco-friendly, sustainable materials, like organic cotton and hemp yarn, so you can create beautiful projects with a clear conscience.
Build Confidence: With guided instructions, you’ll master foundational techniques while creating something you’ll be proud to use or gift.
Explore our collection of beginner crochet kits in the Mouse and Sparrow shop. Let’s create something meaningful together, one stitch at a time.
You’re Just One Stitch Away from Something Amazing
Crochet is a journey of creativity, mindfulness, and joy. With every stitch you make, you’re not just creating something beautiful; you’re building confidence, calming your mind, and discovering a new way to express yourself.
Whether you're starting with a simple chain stitch or diving into a beginner project, remember that each stitch is a step toward something wonderful. Take your time, enjoy the process, and celebrate your progress.
At Mouse and Sparrow, we’re here to support you every step of the way. Explore our stress-free crochet kits, and pattern grab your hook, and let’s make something incredible.
Take your time, be patient with yourself, and enjoy the process.
Happy crocheting!
What’s Next?
Pin this post: Save this tutorial to your Pinterest boards so that you can come back to it later.
Leave a comment: We love to hear your feedback. Tell me in the comments below!
Eco-friendly crochet kits for beginners
Easy crochet patterns for beginners
Additional resources to help you get started:
More inspiring posts


Small crochet projects, like the individual squares in a blanket, may seem like tiny tasks, but they hold incredible power. By breaking down larger projects into manageable pieces, you can reduce overwhelm and make steady progress. This approach not only helps in crafting but also in life. Learn how embracing small steps fosters a sense of accomplishment, boosts your confidence, and makes achieving bigger goals feel more achievable.