
Write Crochet Patterns: Step-by-Step Guide
Are you tired of endlessly searching for the perfect crochet pattern? Have you ever felt overwhelmed trying to start creating your own unique crochet designs, unsure of where to begin or what elements to include?
Picture this: you’re creating crochet pieces tailored precisely to your preferences, from selecting the yarns and colours to realizing your creative concepts with every stitch. You find turning your idea into a finished crochet piece so fulfilling.
Furthermore, you can turn your passion into profit by selling your patterns repeatedly, without the hassle of inventory management or shipping concerns.
I love getting photographs from customers showcasing their creations inspired by my patterns - it’s the best part!
Are you ready to get creative and start designing your crochet pattern?
Let's embark on this journey together!

It’s key to write patterns so that a beginner crocheter can read and understand your instructions.
Write down each step clearly and include as much info as possible to make it as easy as possible to follow your patterns,
Apart from making your patterns beginner-friendly, there are other essentials that you always want to include. This bog post provides templates and a detailed look at each step.
This blog post is divided into the following four steps:
Step 1: Before you start writing your crochet pattern
Step 2: Writing your crochet pattern
Step 3: Publishing your crochet pattern
Step 4: Marketing your crochet pattern
Are you ready to get started?
Prefer to download and print?
You are in luck!
I’ve created a 120-page downloadable e-book which also includes a stitch and abbreviation library and a pattern writing template.
Step 1: Before you start writing your crochet pattern
Understanding the Basics
Essential Crochet Terminology:
Knowledge of common stitches and their corresponding abbreviations is key when writing crochet patterns.
From the foundational "chain stitch (ch)" to"single crochet (sc)" and "double crochet (dc)," to more advanced ones like "picot (p)" and "cluster stitch (cl)," each stitch abbreviation serves as a shorthand guide to convey patterns concisely.
It helps if you familiarize yourself with some of the key terms. This will enhance your understanding of patterns and techniques and empower you to bring your unique crochet visions to life confidently.
UK vs US
Furthermore, it's essential to understand the distinction between the US crochet terms and the UK crochet terms. These two standard sets of terms play a significant role in pattern creation and interpretation within the crochet community.
Here's a helpful list highlighting some of the key differences between the UK and US crochet terms:

Check out this article: Understanding Crochet Hook Sizes and Types
Overview
What to include in a crochet pattern:
Name of the pattern
Intro
Level of difficulty
Materials
Gauge
Size of the finished product
Stitches and abbreviation
Stitch instructions
Notes
Pattern instructions
Pattern support
Copyrights
Planning Your Pattern
Conceptualizing your design:
Before writing your crochet pattern, visualize the finished design in detail. Consider factors such as colour scheme, texture, and overall aesthetic. Whether it's a cosy blanket, a delicate shawl, or a cute amigurumi creature, clarity in your design concept is key to translating your vision into a tangible pattern.
Sketches and prototypes:
Once you have a clear concept, translating that vision into sketches and prototypes can help with pattern development.
Sketching out your design allows you to map out the structure, stitch placement, and any intricate details before diving into the pattern-writing process.
Creating prototypes also enables you to test different stitch combinations, yarn choices, and sizing variations to ensure the final pattern meets your expectations.
Choosing a Name for Your Pattern:
Finding a memorable name for your crochet pattern is not just about labelling your design; it's about creating an identity that resonates with fellow crafters and draws them in.
Tips for a catchy and memorable name that will make your pattern stand out
Reflect on the essence: Capture the essence of your design in the name. Consider elements like stitch patterns, colours, textures, or the inspiration behind the piece. A name that reflects the soul of your creation will pique interest and give crafters a glimpse into what makes your pattern unique.
Keep it concise: Short and snappy names are easier to remember and more likely to make an impact. Aim for a descriptive name, providing a glimpse of what the pattern entails without being longwinded.
Be creative: Infuse creativity and imagination into your pattern name. Play with words, alliteration, or puns that tie back to the design or theme of your crochet creation. A clever and imaginative name can spark curiosity and make your pattern more intriguing.
Consider your audience: Think about your target audience and the message you want to convey. Tailor your pattern name to resonate with the preferences and interests of the crafters who are likely to be drawn to your design. A name that speaks directly to your audience can enhance engagement and connection.
Research and feedback: Before finalizing a name, do some research to ensure it's not already in use or trademarked. Seek feedback from peers, fellow crafters, or focus groups to gauge the appeal and resonance of your chosen name. Honest feedback can help refine and polish your pattern name for maximum impact.
Testing your design:
Creating a Sample Item:
In the realm of crochet pattern writing, creating a sample item is a pivotal step in ensuring your design's accuracy, clarity, and visual appeal. Creating a sample item validates the instructions provided in your pattern and offers invaluable insights into the project's feasibility, sizing, and overall aesthetic.
Whilst creating your sample, make notes of everything you do. It will make things so much easier when you start writing your pattern
Step 2: Writing your crochet pattern
Crafting the Intro
Once you have your notes and finished sample work, you’re ready to start writing your pattern.
Start strong:
At the beginning of your crochet pattern, on the first page, you’ll want to include an intro to your pattern. When articulating and describing your crochet pattern, aim to convey its purpose and potential use effectively.
An example description I’ve done at the start of my patterns is:
“Crafted with love and care, this charming crochet basket embodies the essence of joy. Designed with beginners in mind, it's a delightful project that promises easy creation and adorable results. Soon to become the centrepiece of your home decor collection, this basket is as practical as it is cute, perfect for storage and adding a touch of handmade charm to any space.”
It explains what the pattern is along with how it can be used.
Get creative with your intro and see what happens!
Example intros:
Example 1: Classic Granny Square Blanket
Introduction: Welcome to the Classic Granny Square Blanket crochet pattern, a timeless and versatile project that will add a touch of warmth and nostalgia to your home decor. This pattern features the iconic granny square motif, known for its simplicity and charm, making it an ideal project for crocheters of all skill levels.
Example 2: Cozy Cable Knit Beanie
Introduction: Get ready to stay warm in style with the Cozy Cable Knit Beanie crochet pattern. This classic accessory combines traditional cable stitch techniques with modern flair, creating a hat that is both fashionable and functional. Whether you're a cable crochet enthusiast or looking to expand your skills, this pattern is sure to be a rewarding project.
Example 3: Boho-Chic Fringe Bag
Introduction: Indulge your bohemian spirit with the Boho-Chic Fringe Bag crochet pattern. A trendy accessory that blends classic crochet techniques with playful fringe details, creating a statement piece that is perfect for festivals, beach outings, or everyday adventures.
2. Difficulty Level
Categorizing Your Pattern:
Every crochet pattern has a difficulty level. Whether it’s an amigurumi toy, a pillow, a garment, or a hat, each pattern benefits from sharing how difficult it is to make it. If you use basic stitches and construction methods, then it is directed towards beginners.
Whereas having a pattern that uses multiple methods, or more complex construction and stitches then that will be on the intermediate to advanced level. Including the difficulty helps others know what to expect in your pattern so that they know if their skill level will be able to create it.
Why It Matters:
Tailoring crochet patterns to specific skill levels is a fundamental aspect of pattern design that not only enhances the crafting experience but also empowers crocheters to embark on projects that align with their proficiency and confidence.
Providing patterns that match crocheters' skill levels instils confidence and motivation to tackle new projects.
Success in completing patterns at an appropriate skill level reinforces skills mastery, encourages experimentation, and fosters a sense of accomplishment, driving continued growth and learning.
What is the skill level of your pattern
3. Materials List
Besides the written pattern itself, a materials list is one of the most important parts to include. This is the go-to list for the person making your pattern. They want to know what type of yarn they need to use, what size of hook, and other notions they might need to complete it.
When you list your yarn amounts, you will want to include the brand you used, the yardage the pattern requires, and what yarn weight it is.
Often, people won’t use the yarn you used for the pattern and will choose one of their own that they like. That’s why including all of the information about that yarn is crucial because you’ll want to make sure that they use the right type of yarn and the right amount for making your pattern.
What to Include:
Creating a comprehensive and detailed materials list is an essential part of your crochet pattern. Here's what to include in your materials list:
1. Yarn Type:
Specify the brand, weight, and color(s) of yarn needed for the pattern.
Include any specific yarn characteristics, such as fibre content or texture, that are integral to achieving the desired look and feel of the project.
Offer guidance on yarn substitutions or alternative brands that can be used if the recommended yarn is not available.
2. Hook Size:
Clearly state the crochet hook size required for the pattern, ensuring consistency and accuracy in stitch dimensions.
Mention the type of hook (e.g., ergonomic, steel, Tunisian) if relevant to the project's construction or stitch technique.
Guide on adjusting hook size based on individual tension or desired fabric density, if applicable.
3. Additional Tools:
List any supplementary tools or accessories needed to complete the project, such as:
Scissors for cutting yarn
Yarn needle for weaving in ends
Stitch markers for tracking stitch counts or pattern repeats
Blocking mats and pins for shaping and finishing
Tape measure for checking gauge and sizing
Any speciality tools specific to the pattern, such as cable needles or bead threading tools.
By clearly detailing the yarn type, hook size, and additional tools required for the pattern, you equip crocheters with the foundational elements necessary to begin your pattern. A well-crafted materials list sets the stage for a seamless and enjoyable crochet experience, ensuring that crafters have the essential resources at their disposal.
4. Size
Include the size of the finished product in your pattern. Providing the measurements of the final piece ensures that the crocheter can achieve the same fit or dimensions. This is especially important for creating garments and accessories. Be clear and specific about the finished size.
5. Gauge
Gauge is another key part to include, especially if your pattern is a garment with different sizes. Measuring gauge is essential for determining the size and fit of the finished project, as variations in tension can lead to discrepancies in dimensions
What is a gauge?
Gauge, this is the number of stitches that you fit within a 10 x 10 cm (4″ by 4″) square using the crochet stitch and hook size you used for the pattern. By having a gauge swatch in that size, you can make sure that the person making your pattern gets the same size piece you did. It also is important in helping you do different sizes for garments.
Instruct crocheters to create a gauge swatch using the recommended yarn and hook size, then measure the swatch to verify if it matches the specified gauge. If your finished pattern needs to be blocked then your swatch should be blocked also.
Example Swatch Instructions:
Hook size: 4 mm
Chain 20 sts.
Starting in the 2nd ch from hook, work 1 hdc in each ch across. (19 hdc)
Ch 2, turn. Work hdc in the back loop only for each st across.
Repeat Step 3 for a total of 10 rows.
Measure a 4 x 4 inch (10 x 10 cm) square in the center of your swatch to determine gauge.
Gauge: 15 hdc and 12 rows = 4 inches (10 cm) square
6. Stitches & Abbreviations
Listing Stitches:
Next on the list, we have crochet stitches. Ensure to include stitch abbreviations and the full names of all the stitches used in your pattern.
Abbreviations and full names
Here's how you can effectively list stitches by incorporating abbreviations and full names:
Abbreviations:
Use of Abbreviations: Using stitch abbreviations streamlines pattern instructions, making them more concise and readable. Common crochet abbreviations include "ch" for chain, "sc" for single crochet, "dc" for double crochet, and "sl st" for slip stitch.
Consistency in Abbreviations: Maintain consistency in using standard crochet abbreviations throughout your pattern to avoid confusion or misinterpretation. Refer to industry-standard abbreviation guides to ensure uniformity across patterns.
Full Names:
Importance of Full Names: Including the full names of stitches alongside their abbreviations provides clarification and reinforcement for crocheters, especially beginners or those unfamiliar with common abbreviations. For instance, "Double Crochet (dc)" offers explicit guidance on stitch execution.
Educational Value: Listing full names adds an educational aspect to your pattern, enabling crocheters to learn new stitches and deepen their understanding of crochet terminology. This educational reinforcement fosters skill development and confidence in executing various stitches.
Which stitches abbreviations do you use for your pattern?
7. Explaining Techniques
Explaining techniques is a pivotal aspect that bridges the gap between instruction and execution, guiding your readers through the step-by-step process of implementing various stitches, methods, and constructions.
Clear and concise explanations of techniques not only enhance comprehension but also empower crafters to master new skills and tackle complex projects with confidence.
Here's how you can effectively explain techniques in your crochet patterns:
Interactive Learning:
Foster interactive learning by incorporating links to video tutorials, online resources, or additional references where crocheters can further explore and master the techniques presented in your pattern.
Invite feedback from crocheters on the clarity and effectiveness of the explanations, welcoming suggestions for improvement or additional guidance.
Visual Aids and Diagrams:
Supplement textual instructions with visual aids, such as diagrams, charts, or photos, to enhance understanding and reinforce key points.
Diagrams can illustrate stitch placement, yarn manipulation, hook positioning, and other nuances of the technique, offering a visual reference for crocheters to follow.
8. Pattern Notes:
The notes section is the space where you include things that the person making your pattern needs to be aware of throughout the pattern. This could include anything from saying that it is made in one piece in the round to that your pattern uses U.S. crochet terminology.
Here’s an example of what could be included the pattern note section:
This crochet pattern uses US crochet terminology, with UK versions explained in the Key.
This pattern is worked in continuous rounds, we change colours while crocheting using a method called tapestry crochet.
When we switch colours, you'll see the new colour written in brackets ( ). Check the chart to see how the colours change throughout the project.
Make sure to customize your notes section to match your pattern and include any details you believe are necessary for understanding the instructions.

Crocheting in the rounds.9. Pattern instructions
Now we’re ready to start with the actual pattern crochet instructions. Write down the actual pattern instructions with a logical flow and clarity to guide crocheters through each step of the project with ease. There are many different ways to write a pattern, choose your favourite method and stick to it. Be consistent to avoid confusion.
Divide your pieces for clarity:
The importance of dividing your pattern into different pieces may not always be apparent, especially in simpler projects like hats or scarves. However, in intricate designs like jumpers that involve distinct front, back, sleeves, and neck pieces, a well-segmented set of instructions becomes indispensable. This structured methodology enhances clarity for the crafter and simplifies the overall assembly process.
Likewise, segmentation plays a vital role in amigurumi patterns, where individual components such as heads, legs, arms, and torsos are meticulously crafted before being skillfully assembled to bring forth the charming final toy creation.,
Rounds, Rows or Graph Chart?
After the starting foundation chain, the instructions should be divided row by row or round by round or include a graph chart to follow.
1. Row-by-Row Instructions:
To ensure clarity in your pattern, begin by numbering each row sequentially, starting from Row 1 and progressing to Row 2, Row 3, and so forth. Subsequently, write down the specific crochet stitches corresponding to each row.
For consecutive rows that entail a repetition of the same stitches, you can streamline the instruction by indicating a range, such as Row 2-4 (or any applicable row numbers as per your pattern). This method helps to simplify and consolidate repeated stitch sequences within the pattern.
Example:
Row 1: Ch 30, sc in 2nd ch from hook and in each ch across. (29 sc)Row 2: Ch 1, turn, sc in each st across. (29 sc)Repeat Row 2 for a total of 50 rows.2. In the Rounds:
For projects worked in round and continuous rounds, such as hats, amigurumi, or mandalas, instructions are provided for each round without turning the work. This format eliminates the need to join rows and creates a seamless, circular piece.
Example:
Round 1: Magic ring, 6 sc in ring. (6 sc)Round 2: 2 sc in each st around. (12 sc)Continue increasing by 6 sts each round until you reach the desired diameter.
Crocheting in rows.3. Graph Chart:
Graph charts utilize visual symbols and grids to represent each stitch or colour change in a pattern. This visual aid offers a clear overview of the project's design and layout, making it especially useful for intricate colourwork or complex stitch patterns.
Example:

A section of a crochet colour chart.Each method of presenting a crochet pattern offers its own advantages depending on the project type and complexity. Choosing the right format can enhance clarity, ease of understanding, and overall enjoyment for crocheters following your instructions.
Write a pattern for multiple sizes measurement:
When creating a crochet pattern, especially for garments, it's crucial to account for different sizes to ensure a proper fit and maintain design consistency. In garment patterns, including a range of sizes along with corresponding bust measurements for garments or head circumference for hats is vital for customizing the project to individual requirements.
For example, if your designs cover sizes from XS to XL, include detailed bust measurements for each size to ensure accurate sizing. This same method applies when designing items like hats, where head circumference measurements are key. Luckily, hats typically have a standardized set of sizes, simplifying the sizing process.
Incorporating stitch counts is a key aspect of crafting patterns to effectively accommodate various sizes. When outlining stitch counts for different sizes, it's standard practice to list them in ascending order, starting from the smallest size to the largest, while indicating adjustments for medium and large sizes within parentheses or brackets for clarity and easy reference.
More about measurement:
To determine different size garment measurements to include in a crochet pattern, follow these steps:
Standard Sizes: Begin by researching and understanding the standard body measurements for different sizes (e.g., XS, S, M, L, XL). These measurements typically include chest/bust, waist, hips, sleeve length, and garment length.
Calculations: Use the standard measurements as a reference point to calculate the specific dimensions for each size variation. Determine the necessary increases or decreases in stitches to achieve the desired size adjustments.
Gauge Swatch: Create a gauge swatch using the recommended yarn and hook size in the pattern. Measure the number of stitches and rows per inch in your swatch to ensure accuracy.
Proportionate Adjustments: Make proportionate adjustments based on the difference between the standard measurements and the desired sizes. Increase or decrease stitch counts strategically to scale the garment appropriately.
Pattern Revisions: Modify the pattern instructions to reflect the adjusted measurements for each size. Update the stitch counts, repeats, and shaping details to accommodate the changes while maintaining the overall design and proportions.
Testing: Crochet a sample piece for each size to verify that the measurements align with the intended dimensions. Check the fit and dimensions against the standard sizing guidelines to ensure accuracy.
Documentation: Clearly outline the measurements for each size variation in the crochet pattern. Include a sizing chart or table that specifies the key dimensions for chest, waist, hips, sleeve length, and garment length for easy reference.
Stitch Counts Example: When specifying stitch counts for a small, medium, and large jumper, the progression may look like this:
Small: 40 sts
Medium: (45 sts)
Large: (50 sts)
Example
Row Length Example: For determining the row length where increases or decreases occur, the pattern instructions could be structured as follows:
Row 10: Work even.
Row 11 (Increase Row): Inc 1st at the beginning and end of the row.
Row 12-15: Work even.
Row 16 (Medium/Large Increase Row): Inc 1st at the beginning and end of the row for medium and large sizes.
Repeats in the pattern:
In crochet patterns, repetitions are essential for conveying instructions effectively. Symbols such as ** are frequently used within the list of standard stitches and abbreviations to signify where these repeats occur in the pattern.
Examples:
1. Symbolic Repeat Instruction:
Symbol ** used to denote a specific repeat segment: Row 1: *(Sc in next st, ch 1)* across, turn.
2. Verbal Repeat Instruction:
Clear verbal instruction for a repeat sequence: Row 1: Sc in each st, repeat to the end of the row, turn.
Stitch counts:
One common practice is to place stitch counts at the end of each row or round to indicate the total number of stitches that should be present at that point. This allows the crocheter to compare their work against the expected count and make corrections if needed. Additionally, when there are significant changes in stitch counts due to shaping, increases, or decreases, it is beneficial to include these counts within the pattern instructions at the relevant points. Highlighting these changes helps the crocheter understand the pattern's structure and aids in maintaining the correct stitch count throughout the project.
Sample Stitch Count Placement:
Row 1: Ch 20, sc in the 2nd ch from hook and in each ch across. (19 sc)
Row 2: Ch 1, turn, sc in each st across. (19 sc)
Row 3-6: Repeat Row 2. (19 sc)
Row 7: Ch 1, turn, sc2tog, sc in each st across until 2 sts remain, sc2tog. (17 sc)
Row 8: Ch 1, turn, sc in each st across. (17 sc)
Finishing and assembling:
In the "Finishing and Assembling" section of a crochet pattern, it's essential to include the following information:
Weaving in Ends: Explain the importance of securely weaving in loose yarn ends to prevent unraveling and provide guidance on the weaving-in process.
Blocking Instructions: Detail the blocking technique suitable for the project, including how to shape and size the finished piece for optimal results.
Seaming Techniques: Outline the methods for joining individual crocheted pieces together, emphasizing proper seam placement and the specific joining techniques to use.
Embellishments: Mention how to add embellishments like buttons, tassels, or appliques to enhance the project, along with instructions on attaching them securely.
Final Touches: Suggest a thorough inspection of the work for imperfections, providing guidance on correcting any issues like trimming yarn fibers or reshaping edges.
Finishing Instructions: Summarize the finishing steps needed to complete the project successfully, offering any additional tips or recommendations for achieving a polished outcome.
Using Photos:
Using photos in your pattern is key as they provide visual clarity on how the pattern appears when worn, displayed in a home setting, or used as a playful item.
Images capture intricate details of the pattern that written descriptions alone may struggle to convey, providing a visually engaging way to highlight the distinctive elements of your design. I typically begin with an introductory photo of the pattern and include step-by-step images where needed, particularly for intricate techniques or assembly instructions.
For example, when the pattern requires assembly, incorporating photos demonstrating the assembly process is vital. Likewise, for any unique techniques present in the pattern, visual aids play a crucial role in facilitating understanding. By integrating images for these specific elements, the pattern's accessibility and user-friendliness are greatly enhanced.
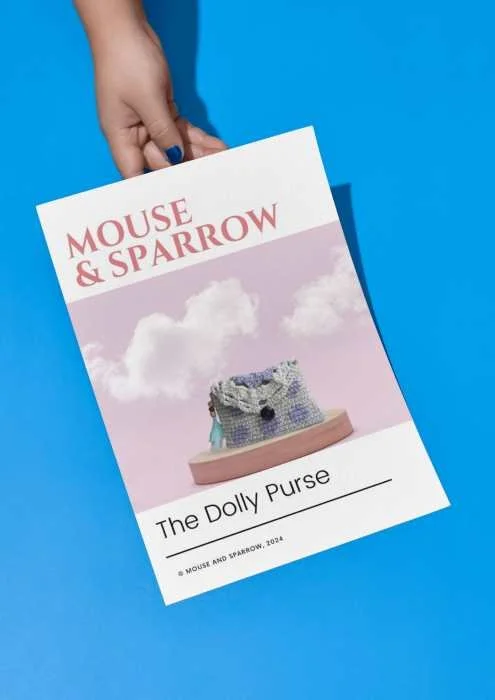
Pattern copyright Information:
In every pattern I create, I include a copyright section at the footer of each PDF page. It reads, "© 2024 Mouse and Sparrow. This pattern is intended for personal use only. Please refrain from selling, distributing, or claiming it as your own."
The copyright symbol accompanies this statement, solidifying the official copyright status of the design under your ownership.
This copyright notice is documentation that validates the pattern as your intellectual property, providing protection against unauthorized use. While it may not eliminate the risk of pattern theft, it establishes clear legal boundaries for users.
Moreover, informing buyers within this section about the permissibility of selling items made from your pattern reinforces the importance of crediting you as the designer.
Typically positioned at the bottom of the initial PDF page, consider including this information on every page of your pattern to enhance visibility and clarity.
Check out this article: Checklist: How To Successfully Create A Crochet Pattern
Formatting your pattern:
When it comes to writing crochet patterns, formatting your instructions plays an important role in ensuring clarity and ease of use. Here are key considerations to make your pattern user-friendly:
1. Clear and Concise Language: Use straightforward language that is easy to understand. Avoid jargon and overly complex terms that might confuse the reader.
2. Visual Aids: Incorporate diagrams, charts, or photos where necessary to visually demonstrate techniques or tricky steps. Visual aids complement written instructions and cater to different learning styles.
3. Consistent Formatting: Maintain consistency in formatting throughout your pattern. Use the same font, text size, colors, and spacing to create a cohesive look that is visually appealing and easy to navigate.
4. Organization: Arrange your pattern in a logical sequence, starting from the materials needed to the final finishing touches. Group related instructions together to prevent confusion and ensure a smooth flow of the pattern.
5. Abbreviations Key: Include an abbreviations key at the beginning of your pattern to decode any shorthand terms used. This helps users quickly reference and understand the instructions without interruptions.
Adding the final touches:
Let’s add the final touches to your pattern. By focusing on details such as formatting, visual elements, and supplementary information, designers can ensure that their pattern not only conveys instructions effectively but also engages and inspires crocheters. Ensuring that the pattern is polished and tailored to meet the needs of the audience enhances its appeal and sets the stage for a positive and rewarding crocheting experience.
Testimonials or Endorsements:
Include Testimonials: If available, consider adding testimonials from testers or satisfied users to build credibility and trust in the pattern.
Call to Action:
Encourage Sharing: Include a call to action encouraging users to share their completed projects on social media using a specific hashtag or tagging your brand.
Tools for writing and formatting your crochet pattern:
When it comes to writing and formatting crochet patterns, you can use various digital tools. Whether you need to create stitch charts, format your written instructions, or design visual elements, here are some platforms that can assist you in creating and editing, your crochet patterns:
Charts
Stitch Fiddle: Stitch Fiddle is a popular online tool that allows you to design crochet charts, colorwork patterns, and stitch diagrams. It offers features for customizing stitch symbols, adjusting grid sizes, and exporting patterns in different formats.
Chart Minder: Chart Minder is a web-based application tailored for crafters to create and share crochet charts, knitting patterns, and cross-stitch designs. It provides intuitive chart editing tools and template options for pattern organization.
Stitch Works Software: Stitch Works Software offers a range of applications for designing crochet, knitting, and cross-stitch patterns. Users can generate detailed stitch charts, customize symbols, and annotate patterns with notes and instructions.
Crochet Charts: Crochet Charts is an online tool specifically designed for crocheters to create stitch diagrams and visual representations of crochet patterns. It supports various stitch types, colors, and repeat options for intricate designs.
Formatting
Canva: Canva is a versatile graphic design platform that enables users to design visually appealing crochet pattern templates, promotional materials, and PDF documents. It offers a user-friendly interface and customizable templates for pattern creation.
Adobe Spark: Adobe Spark provides creative tools for designing professional-looking graphics, social media posts, and printable materials. Crocheters can utilize Adobe Spark to create visually engaging pattern layouts, step-by-step guides, and branding elements.
Piktochart: Piktochart is a graphic design tool suitable for crafting infographics, presentations, and visual content. Use this tool to create informative crochet pattern visuals, stitch glossaries, and instructional graphics for your patterns.
Google Docs Drawing Tool: Google Docs includes a drawing tool that allows you to create simple diagrams, illustrations, and charts directly within your document. This feature can be handy for adding basic visual aids to your written crochet patterns.
Check out this article: How To Start Selling Your Crochet Products
Test run your crochet pattern:
Conducting a test run of your crochet pattern before publication is a critical step that can significantly enhance the quality, accuracy, and user experience of your design. A test run is an opportunity to identify and address any issues, errors, or ambiguities within the pattern.
Here's why incorporating a test run into your pattern-writing process is essential:
Validation of Instructions: Testing your pattern validates the clarity and coherence of the instructions provided. By working through the pattern yourself or engaging test crocheters, you can identify any inconsistencies, missing details, or confusing sections that may hinder the understanding of crafters following your pattern.
Error Detection and Correction: A test run allows you to spot and rectify potential errors in stitch counts, shaping techniques, colour changes, or sizing discrepancies before the pattern is finalized. By troubleshooting these issues during the testing phase, you can uphold the integrity of your design.
Feedback and Improvement: Getting feedback from test crocheters provides valuable insights into how well the pattern translates from concept to execution. Constructive feedback can highlight areas for improvement, suggest alternative approaches, or point out potential pitfalls that may have been overlooked. Leveraging this feedback can lead to refinements that enhance the overall usability and clarity of your pattern.
Enhanced User Experience: A thoroughly tested crochet pattern is a more enjoyable experience for crafters. By ironing out any kinks, addressing concerns, and ensuring accuracy through testing, you set crafters up for success, boosting their confidence in following your pattern and achieving the desired outcome.
Credibility and Trust: Demonstrating a commitment to quality through testing instils credibility and trust in your pattern-writing skills. Crafters are more likely to engage with patterns that have undergone thorough testing, knowing that the instructions have been vetted and verified for accuracy and reliability.
Who should test your pattern?
Testing a crochet pattern can be done by various individuals with different levels of expertise in crochet.
Here are some options for who can test a crochet pattern:
Experienced Crocheters: Those who have advanced skills and experience in crocheting can provide thorough testing of a pattern, identifying any errors, ambiguities, or areas for improvement.
Beginner Crocheters: Beginners can also test crochet patterns to assess the clarity and ease of understanding for someone new to the craft. Their feedback can help simplify instructions for novice crocheters.
Pattern Testers: Dedicated pattern testers, often found in online crochet communities or groups, volunteer to test patterns for designers. They follow instructions precisely and provide detailed feedback on their experience.
Crochet Instructors: Crochet teachers or instructors can test patterns to evaluate their suitability for use in classes or workshops. Their perspective can ensure that patterns are clear and engaging for teaching purposes.
Friends and Family: Enlisting friends or family members who crochet at different skill levels can offer a diverse range of perspectives on a pattern's clarity and usability.
Online Communities: Virtual crochet communities and forums are great places to find willing testers who can provide valuable feedback on patterns shared within the group.
Technical editor: Before publication, involve a tech editor for a final review of the pattern. A tech editor can enhance the quality, and clarity of your pattern. This helps catch any last-minute errors or inconsistencies before the pattern reaches a wider audience. Tech editors maintain consistency in wording, formatting, and style throughout the pattern.
By involving a mix of individuals with varying crochet skills and backgrounds, pattern designers can gather comprehensive feedback to refine and improve their crochet patterns.
Check out this article: How To Start An Online Crochet Store
How to find crochet pattern testers:
An easy way to find crochet pattern testers is by joining a Crochet Group or community. Look for crochet-related groups on platforms like Facebook, Reddit, or Instagram. These communities often have members willing to volunteer as pattern testers.
In addition, you can post a Call for Testers on social media. Create a post or graphic announcing that you're looking for pattern testers. Clearly outline the requirements, such as skill level, availability, and expected feedback.
Consider offering incentives such as a free copy of the final pattern, a discount on future patterns, or a shoutout on social media to encourage more testers to participate.
Adjust your pattern for errors:
Analyse the feedback your testers provided and adjust your crochet pattern accordingly. Continual iteration based on tester insights fosters a collaborative approach to pattern development, resulting in patterns that are accurate, accessible, and enjoyable to work with.

Pricing Your Pattern:
Setting the right price for your crochet pattern is essential to reflect its value, cover your efforts, and attract potential customers. By incorporating these elements into your pricing formula, you can establish a fair and sustainable pricing structure that reflects the value of your work and covers all associated expenses. Here are key considerations to include in your pricing strategy:
Your Time:
Design Time: Account for the time spent on creating and refining the design, including making prototypes, unraveling mistakes, and revising the pattern.
Pattern Writing: Factor in the hours spent writing and formatting the pattern instructions to ensure clarity and consistency.
Photography and Editing: Include the time invested in capturing high-quality images of the finished item and editing them for use in the pattern and marketing materials.
Collaboration: Consider the time spent coordinating with testers, tech editors, and other collaborators to ensure the pattern's accuracy and quality.
SEO Research and Marketing: Allocate time for researching keywords, optimizing content for search engines, and promoting the pattern across various platforms.
Expenses:
Professional Services: Account for expenses related to hiring a tech editor, testers, photographers, models, or video production services to enhance the presentation and quality of the pattern.
Materials Costs: Include the cost of yarn and any other materials used in creating the design, as well as shipping costs for sending products to testers if applicable.
Marketplace and Processing Fees: Deduct fees associated with selling on e-commerce platforms, credit card processing fees, and any additional charges incurred during the sales transaction.
Income Taxes: Set aside a portion of your earnings to cover income taxes, ensuring compliance with financial obligations.
evaluating these elements of cost and investment can give an understanding of the resources required to create, market, and sell your crochet patterns.
When strategizing your pricing approach, it can be beneficial to define a starting point. In my case, the foundational price for a simple crochet pattern is set at $5.

Step 3: Publishing Your Crochet Pattern
Hurra you made it this far! Now it is time to publish your pattern!
When sharing your crochet patterns with the world, selecting the right platform is crucial for reaching your target audience and maximizing your pattern's visibility.
Whether you opt for established marketplaces like Etsy and Ravelry or decide to offer your patterns on your website, each platform offers unique advantages and considerations that can impact your success as a designer.
Choosing a Platform:
1. Where to Publish:
Etsy: Known for its handmade and craft-focused marketplace, Etsy provides a platform tailored to creative artisans looking to sell their patterns directly to a vast community of craft enthusiasts.
Ravelry: A popular hub for knitters and crocheters, Ravelry offers a dedicated space for designers to share, sell, and promote their patterns within a niche audience passionate about fibre arts.
Personal Website: Hosting your patterns on your website grants you full control over branding, pricing, and marketing strategies, allowing you to build a direct relationship with your audience.
Let’s look at the three examples in more detail
Pros and Cons of Each Platform:
Etsy:
Pros:
Access to a large and diverse customer base actively seeking handmade and unique patterns.
Built-in e-commerce tools for managing listings, orders, and customer communication.
Exposure to Etsy's marketing initiatives and promotional opportunities to boost pattern visibility.
Cons:
Transaction fees and listing costs associated with selling on the platform.
Competition from other sellers offering similar products, requiring strategic marketing efforts to stand out.
Ravelry:
Pros:
Specialized community of yarn enthusiasts and dedicated crafters interested in high-quality patterns.
Features for interacting with users, organizing pattern libraries, and participating in forums to engage with the community.
Integration with pattern sales and downloads, making it convenient for users to purchase and access patterns.
Cons:
Limited discoverability outside the knitting and crochet community, potentially restricting exposure to a broader audience.
Adherence to Ravelry's guidelines and policies regarding pattern content and promotion.
Personal Website:
Pros:
Complete control over branding, design, and pricing structure to tailor the shopping experience to your audience.
Direct access to customer data and analytics for personalized marketing and retargeting strategies.
Freedom to experiment with different sales techniques, promotions, and exclusive offerings to drive pattern sales.
Cons:
Requires additional effort and investment in website development, maintenance, and marketing to drive traffic and conversions.
Limited initial exposure compared to established marketplaces, necessitating proactive outreach and promotional efforts to grow your audience.
Look at the advantages and limitations of each platform in alignment with your goals and target audience. Based on your research, decide where to publish your crochet patterns for optimal visibility and sales.

Step 4: Promoting your crochet pattern
Promoting your pattern is key to driving visibility, engagement, and sales. By implementing strategic marketing tactics and leveraging various channels, you can attract a wider audience, and foster a community of dedicated followers.
Consider incorporating a mix of the following strategies to give your crochet pattern an extra boost of visibility:
Social Media Marketing
Visual Content: Utilize platforms like Instagram, Pinterest, and Facebook to visually showcase your patterns through high-quality images and videos.
Engagement: Interact with your audience, respond to comments, host giveaways, and collaborate with influencers to build a loyal following.
Hashtags: Research and use relevant hashtags to increase discoverability and reach a broader audience interested in crochet.
Email marketing
Newsletter Campaigns: Build an email list of subscribers interested in your patterns and send regular newsletters featuring new releases, discounts, and exclusive content.
Segmentation: Personalize your emails based on subscriber preferences, purchase history, and behavior to deliver targeted and relevant promotions.
Collaborations and partnerships
Influencer Collaborations: Partner with influencers, bloggers, or designers in the crochet niche to promote your patterns to their audience.
Cross-Promotions: Collaborate with complementary businesses or creators to cross-promote each other's work and expand your reach organically.
SEO and content marketing
Blog Posts: Create engaging blog content related to crochet tips, tutorials, and behind-the-scenes insights to attract organic traffic to your website.
Keyword Optimization: Research and incorporate relevant keywords into your content, pattern descriptions, and metadata to improve search engine visibility.
Paid advertising
Google Ads: Run targeted ads on Google using relevant keywords to reach users actively searching for crochet patterns.
Social Media Ads: Boost posts, create carousel ads, or run sponsored campaigns on social media platforms to reach a larger audience and drive traffic to your patterns.
Community engagement
Forums and Groups: Participate in online crochet forums, Facebook groups, or Reddit communities to share your patterns, offer advice, and connect with fellow crafters.
Virtual Events: Host virtual workshops, webinars, or live sessions to showcase your patterns, interact with your audience, and build a sense of community.

There you have it! A breakdown of how to write a crochet pattern!
Ready to get started?
As I wrap up this journey through the world of crochet pattern writing, remember that your success hinges not just on the quality of your patterns, but also on your determination, creativity, and resilience.
Embrace this pattern-creation journey and hone your skills.
I hope this guide will inspire you to create crochet patterns and give you the confidence to embark on your pattern-writing journey!
Remember, everyone started right where you are now - with a passion for their craft and a dream to share it with the world.
Your crochet pattern journey begins now, and the world is eager to see your unique creations.
Happy crocheting!
I'd love to hear about your pattern writing journey in the comments!
More inspiring posts


Feeling stuck between UK and US crochet terms? You’re not alone—and you’re not doing anything wrong. This guide breaks down one of the most overlooked crochet basics: the confusing stitch name switch between British and American patterns. Get clarity, skip the frustration, and get back to the fun part—actually crocheting.