
Crochet Blanket Squares: Single Colour Granny Square (Part 3)
This post may contain affiliate links.
Starting your first crochet blanket can feel like standing at the base of a mountain, wondering how you'll ever reach the summit. As a beginner, the prospect of creating something large enough to drape over your sofa might seem impossibly daunting.
Take a deep breath. Your crochet journey begins with a single, simple step: the Single-Color Granny Square.
This timeless pattern has initiated countless crocheters into the craft for good reason. It's approachable, adaptable, and surprisingly forgiving of beginner mistakes. The beauty of the granny square lies in its simplicity—a meditative rhythm of stitches that quickly becomes second nature.
What makes this pattern particularly special for beginners is the immediate sense of accomplishment.
Each completed square represents a tangible achievement, a building block toward your finished blanket.
Before you know it, you'll transition from cautiously counting stitches to confidently creating squares while chatting with friends or enjoying your favorite show.
Ready to transform yarn into something beautiful? Let's begin this journey together, one stitch at a time.
From Beginner to Blanket: Mastering the Single-Color Granny Square
Weekly Pattern Sampler: Square at a Time! - PART 3
Our Weekly Pattern Sampler helps you master new crochet techniques, one square at a time. Each week, you'll add a new textured square to your growing collection, slowly building the foundation for a stunning, handmade blanket. It’s the perfect way to level up your skills, stay inspired, and create something truly unique—and it’s all done at your own pace.
✵ How It Works:
Every week, you’ll get a fresh pattern (don’t forget to sign up for our mailing list so you don’t miss out!).
Crochet two squares using complementary colours, and by the end of the week, you’ll have two pieces that highlight how much you’ve learned. 🌟 Ready to see your progress unfold? 🌟
This Week’s Crochet Pattern:
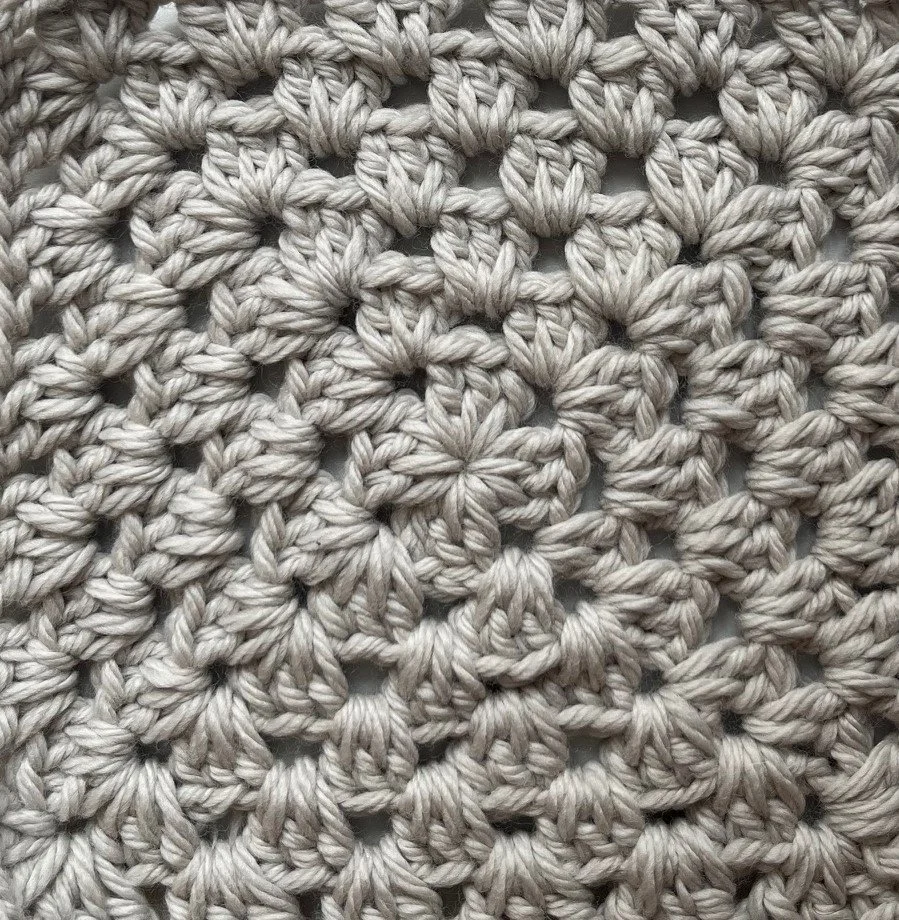
A combination of—Single-colour Granny Square 🎉
This week’s stitch is perfect for beginners, you can also make this square in multiple colours.
If you’re new to crochet, don’t worry! This stitch is easy to pick up, and once you get into the rhythm, you’ll be surprised at how fast your squares come together.
Not sure how to do a single crochet stitch? Check out this post for a step-by-step guide before you get started!
✵ Start your crochet journey with A Beginner’s Guide to Crochet: Starting Your Journey to a More Relaxed You and discover the calming power of crafting!
Materials You’ll Need
Yarn Recommendations
Before diving into the stitch, let’s talk about the best yarn for this project. Choosing the right yarn will make crocheting easier and more enjoyable while ensuring your final blanket looks stunning. Plus, selecting complementary colours can turn each square into a true visual masterpiece!
Yarn Weight:
Go for a light to medium-weight yarn—worsted weight (#4) is ideal. It’s easy to work with and provides the right amount of structure for textured stitches, especially the bobble stitch.
Material:
Organic cotton or wool are excellent options. They’re soft, durable, and provide just the right grip for beginners, making it easier to manipulate stitches without frustration. They also showcase textured stitches beautifully, giving your blanket added depth and charm.
Colour Choices:
When choosing colours, aim for complementary shades that will stand out against each other but still work harmoniously. For example:
Earthy Tones: Combine a deep forest green with a soft cream.
Cool Neutrals: Pair a smoky grey with a pale blue.
Bold and Bright: Use a cheerful yellow alongside a muted lavender.
Crocheting each square in two complementary colors will give your blanket a cohesive yet dynamic look. The contrast will make each bobble pop and highlight your hard work as your blanket grows.
✵ More on the topic: Colour Therapy in Crochet: Choosing Yarns for Mood
What to Avoid:
Steer clear of yarns that are too slippery (like silk or rayon blends) or too fine (super thin cotton or lace-weight yarn). These can make stitches difficult to control, leading to unnecessary frustration. The goal is to choose yarn that feels good in your hands, stays on the hook, and lets your creativity shine!
Recommended Yarn for Practicing The This Crochet Stitch
I highly recommend the Lion Brand Yarn Basic Stitch Anti-Pilling Knitting Yarn in white.
Here's why:
Beginner-Friendly Texture
This yarn is smooth, soft, and easy to work with, making it perfect for practicing single crochet stitches. It glides effortlessly over your hook without splitting, so you can focus on your technique instead of fighting with tricky yarn.Anti-Pilling for Long-Lasting Projects
Ever notice how some yarns fuzz up or look worn after a few washes? Not this one. The anti-pilling technology ensures that your finished pieces stay fresh and neat, even with regular use. Perfect for anything from cozy scarves to everyday washcloths.Versatile Weight
This yarn is a medium (4) weight, which is ideal for beginners. It’s not too thin or too thick, making it easy to see your stitches and handle the yarn as you learn.Classic White Colour
White yarn is fantastic for learning because it makes your stitches stand out, allowing you to see every loop and detail clearly. Plus, it pairs well with any other colours if you want to experiment.
Crochet Hook
As for the crochet hook, the general rule is that your hook should match your yarn weight.
For worsted weight yarn, a G-6 (4mm) hook is a great place to start. It’s not too big, not too small, and it feels comfortable in most hands.
Now, you might think all hooks are the same, but they aren’t. Crochet hooks come in different materials—metal, wood, plastic, and even bamboo. If you’re just beginning, a lightweight metal or plastic hook is probably your best choice. This These types let your yarn glide through the stitches with less friction, making the process smoother.
To get started I recommend this crochet hook set from Yarniss you can find it here on Amazon.
The design of these hooks features soft, rubberized grips that fit snugly in your hand, reducing strain and fatigue.
Perfect for All Skill Levels
With 14 hook sizes ranging from 2mm to 10mm, this set is versatile enough for every project. You’ll always have the right size handy.Smooth Hook Heads
The aluminum tips glide effortlessly through yarn without snagging or splitting, making it easier to keep your tension consistent—an essential skill for mastering single crochet stitches.
✵ More about crochet hooks: Understanding Crochet Hook Sizes and Types
Optional Tools
While you can definitely crochet without extras, a few tools can make your life easier:
Yarn needle: Perfect for weaving in ends once you're done.
Scissors: A sharp pair will make cutting the yarn neat and easy.
Start simple and add tools as you go. The key is to keep it relaxed and not overwhelm yourself with too much
✵ New to crochet? Start here: How to Do a Single Crochet

Here's how this crochet pattern goes:
Skill Level – Easy
Pattern Notes
This pattern uses US crochet terms. The UK equivalent is provided.
I used a chunky yarn with a 6 mm hook.
Stitch abbreviation:
ch = chain(s);
dc = Double Crochet (US) this is the same as a tr = Treble Crochet (UK)
ch = Chain Stitch
st(s) = stitch(es);
Note: In the following instructions, I’ll spell out the abbreviations to make it easier for beginners who are just learning to read crochet patterns.
The ch-3 at the beginning of each round counts as a double crochet [UK: treble crochet].
The pattern creates clusters of 3 double crochet separated by ch-2 spaces.
Each round begins and ends in a corner space.
Pin to Pinterest to save for later!
Start the Crochet Pattern
Instructions:
Foundation:
Chain 5.
Slip stitch into the first chain to create a ring.
Round 1:
Ch 3 (counts as first double crochet [UK: treble crochet]).
Work 2 double crochet [UK: treble crochet] into the ring.
Ch 2.
Work 3 double crochet [UK: treble crochet] into the ring.
Ch 2.
Work 3 double crochet [UK: treble crochet] into the ring.
Ch 2.
Work 3 double crochet [UK: treble crochet] into the ring.
Ch 2.
Sl st to the top of the beginning ch-3 to join.

End of round 1. Slip stitch to the next corner ch-2 space.

Chain 3 at beginning of round 2.
Round 2:
Sl st into the next 2 double crochet [UK: treble crochet] and into the corner ch-2 space.
Ch 3 (counts as first double crochet [UK: treble crochet]).
Work 2 double crochet [UK: treble crochet] in the same corner space.
Ch 2 and work another 3 double crochet [UK: treble crochet] in the same corner space.
Ch 1.
In the next corner space, work 3 double crochet [UK: treble crochet].
Ch 2 and work another 3 double crochet [UK: treble crochet] in the same corner space.
Ch 1.
In the next corner space, work 3 double crochet [UK: treble crochet].
Ch 2 and work another 3 double crochet [UK: treble crochet] in the same corner space.
Ch 1.
In the next corner space, work 3 double crochet [UK: treble crochet].
Ch 2 and work 3 double crochet [UK: treble crochet] in the same corner space.
Ch 1.
Sl st to the top of the beginning ch-3 to join.

Round 3:
Sl st into the next 2 double crochet [UK: treble crochet] and into the corner ch-2 space.
Ch 3 (counts as first double crochet [UK: treble crochet]).
Work 2 double crochet [UK: treble crochet] in the same corner space.
Ch 2 and work another 3 double crochet [UK: treble crochet] in the same corner space.
Ch 1.
Work 3 double crochet [UK: treble crochet] in the next ch-1 space.
Ch 1.
In the next corner space, work 3 double crochet [UK: treble crochet].
Ch 2 and work another 3 double crochet [UK: treble crochet] in the same corner space.
Ch 1.
Work 3 double crochet [UK: treble crochet] in the next ch-1 space.
Ch 1.
In the next corner space, work 3 double crochet [UK: treble crochet].
Ch 2 and work another 3 double crochet [UK: treble crochet] in the same corner space.
Ch 1.
Work 3 double crochet [UK: treble crochet] in the next ch-1 space.
Ch 1.
In the next corner space, work 3 double crochet [UK: treble crochet].
Ch 2 and work another 3 double crochet [UK: treble crochet] in the same corner space.
Ch 1.
Work 3 double crochet [UK: treble crochet] in the next ch-1 space.
Ch 1.
Sl st to the top of the beginning ch-3 to join.
Round 4:
Sl st into the next 2 double crochet [UK: treble crochet] and into the corner ch-2 space.
Ch 3 (counts as first double crochet [UK: treble crochet]).
Work 2 double crochet [UK: treble crochet] in the same corner space.
Ch 2 and work another 3 double crochet [UK: treble crochet] in the same corner space.
Ch 1.
Work 3 double crochet [UK: treble crochet] in the next ch-1 space.
Ch 1.
Work 3 double crochet [UK: treble crochet] in the next ch-1 space.
Ch 1.
In the next corner space, work 3 double crochet [UK: treble crochet].
Ch 2 and work another 3 double crochet [UK: treble crochet] in the same corner space.
Ch 1.
Continue Round 4:
Repeat steps 7-13 for the remaining three sides, adjusting the number of ch-1 spaces as needed depending on how many spaces are along each side.
End with a slip stitch to the top of the beginning ch-3.

Subsequent Rounds:
For rounds 5 and beyond, follow the same pattern as Round 4:
Sl st into the next 2 double crochet [UK: treble crochet] and into the corner ch-2 space.
Ch 3 (counts as first double crochet [UK: treble crochet]).
Work 2 double crochet [UK: treble crochet] in the same corner space.
Ch 2.
Work 3 double crochet [UK: treble crochet] in the same corner space.
Ch 1.
Work 3 double crochet [UK: treble crochet] in each ch-1 space along the side, with ch-1 between each group.
When you reach a corner, work (3 double crochet [UK: treble crochet], ch 2, 3 double crochet [UK: treble crochet]) in the corner space.
Repeat around all four sides.
Sl st to the top of the beginning ch-3 to join.
Continue adding rounds until your square reaches approximately 20 cm × 20 cm (about 10-12 rounds depending on your yarn and tension).
To finish:
Cut yarn, leaving a tail of about 15 cm.
Pull the tail through the last loop on your hook to secure.
Weave in all ends with a yarn needle.
4 Tips for Success with Your Granny Square Pattern for Beginners
▶ Maintain consistent tension - Try to keep your stitches neither too tight nor too loose. This is one of the most important skills for beginners to develop. Your square will look neater and be easier to work with if your tension remains even throughout. Hold your yarn gently but firmly, and practice until it feels comfortable.
▶ Count your stitches regularly - After completing each round, count to make sure you have the correct number of stitches on each side. For a granny square, ensure you have 3 double crochets in each cluster, the correct number of clusters per side, and ch-2 in each corner. This prevents your square from becoming lopsided.
▶ Pay special attention to corners - The corners are crucial for a square shape. Always make sure you're working (3 double crochet, chain 2, 3 double crochet) in each corner space. If your square starts curling or doesn't lie flat, you might be missing chains in the corners.
▶ Join rounds carefully - When joining at the end of each round, make sure you're slip stitching to the top of the beginning chain-3, not into a different stitch. Use a stitch marker (or even a small piece of contrasting yarn) to mark the beginning of each round if you're having trouble identifying where to join.
Ready to Create Your Blanket Squares?
Remember, every stitch you make gets you one step closer to something beautiful.
Crocheting isn’t just about the end result—it’s about enjoying the journey and celebrating each little victory along the way. Whether you're a complete beginner or a seasoned pro, every row brings you closer to mastering something new.
Take a deep breath, relax, and find joy in the process. You’re doing amazing!
Want to keep growing your skills and add more squares to your blanket?
Sign up for our newsletter to have the next part of the Weekly Pattern Sampler delivered right to your inbox. Every week brings a fresh stitch and a new burst of inspiration!
And we’d love to see how you’re doing—share your squares and color combos with us to show off your creativity!
What’s Next?
Pin this post: Save this tutorial to your Pinterest boards so that you can come back to it later.
Leave a comment: We love to hear your feedback. Tell me in the comments below!
Eco-friendly crochet kits for beginners
Easy crochet patterns for beginners
More inspiring posts


Feeling stuck between UK and US crochet terms? You’re not alone—and you’re not doing anything wrong. This guide breaks down one of the most overlooked crochet basics: the confusing stitch name switch between British and American patterns. Get clarity, skip the frustration, and get back to the fun part—actually crocheting.